Quick Answer
Ice dams form when snow melts on a warmer section of the roof, flows down to the colder eaves, and refreezes along the roof edge. Over time, the ice buildup can block drainage and allow meltwater to back up under shingles.
Roof de-icing cables can help reduce ice dam risk by creating melt paths along roof edges, gutters, and downspouts. They work best when combined with proper attic insulation, ventilation, clean gutters, correct cable layout, and seasonal inspection.
Ice dams are one of the most common winter roofing problems for homes in cold and snowy regions. They can appear along roof edges, gutters, valleys, and downspouts when snowmelt refreezes before it can drain away.
For homeowners, the problem is not only the ice you can see from the ground. The bigger concern is the water trapped behind the ice. If water backs up under shingles or enters the roof structure, it may lead to leaks, insulation damage, interior stains, and other repair issues.
How Do Ice Dams Form?
Ice dams usually start with uneven roof temperatures. Warm air from the living space or attic can warm the upper roof area. Snow on that warmer section begins to melt, and the meltwater runs down toward the roof edge.
When the water reaches the colder eaves, gutters, or overhangs, it can refreeze. As this melt-and-refreeze cycle repeats, a ridge of ice builds up along the edge of the roof. That ridge becomes the ice dam.
Important: roof de-icing cable can help manage drainage paths, but attic heat loss, insulation, ventilation, roof design, and weather conditions also affect ice dam formation.
Why Ice Dams Can Damage a Home
Once ice blocks drainage, new meltwater may collect behind the dam. If that water finds a path under shingles, flashing, or roof edges, it may enter areas that are not designed to handle standing water.
Homeowner note: if you already see ceiling stains, water dripping, soaked insulation, or recurring ice dams, consider contacting a roofing professional before the next major freeze.
Traditional Ice Dam Solutions: What to Know
Homeowners often try to handle ice dams with manual snow removal or chemical de-icers. These methods may help in certain situations, but each has drawbacks.
| Method | How It Helps | Limitations |
| Manual Snow Removal | Removes snow load before repeated melting and refreezing occurs. | Climbing or working near the roof can be dangerous, and poor technique can damage shingles or gutters. |
| Roof Rake | Allows some snow removal from the ground for lower roof edges. | May not reach high, steep, or complex roof areas, and improper use can scrape roofing materials. |
| Chemical De-Icers | Can help melt selected ice buildup in some situations. | May affect plants, metal surfaces, pets, runoff areas, or roofing materials depending on the product. |
| Roof De-Icing Cable | Helps create melt paths along roof edges, gutters, and downspouts. | Requires correct layout, power, clips, controls, and inspection. It does not replace attic insulation or ventilation work. |
How Roof De-Icing Cables Help
Roof de-icing cables are installed along freeze-prone roof edges, gutters, and downspouts. When powered under suitable winter conditions, they help create channels that allow meltwater to drain instead of collecting behind ice.
This makes them especially useful for homes with repeated ice buildup at eaves, shaded roof edges, gutter corners, or long downspout runs.
YeloDeer Roof De-Icing Cable
YeloDeer roof de-icing products are designed to help manage ice buildup along roof edges, gutters, and downspouts when properly selected, installed, controlled, and maintained.
Explore Roof De-Icing ProductsBenefits of Installing Roof De-Icing Cables
For homes with recurring ice dam issues, roof de-icing cable can be a practical part of a winter roof protection plan.
Where Should Roof De-Icing Cable Be Installed?
Roof de-icing cable is usually placed where ice commonly blocks drainage. The exact layout depends on roof shape, gutter design, snow pattern, and problem areas.
Layout note: roof heating cable should be installed according to the product manual. Incorrect cable spacing, missing gutter runs, or skipped downspouts can reduce system effectiveness.
Roof De-Icing Cable Is Not the Only Fix
If ice dams keep coming back every winter, cable may help manage the symptoms, but the root cause may involve attic heat loss or ventilation problems.
For a more complete approach, homeowners should also review:
Important: roof de-icing cable is a drainage support tool. It should not be treated as a substitute for fixing major attic heat loss, roof leaks, or damaged gutters.
Use a Controller for Better Energy Management
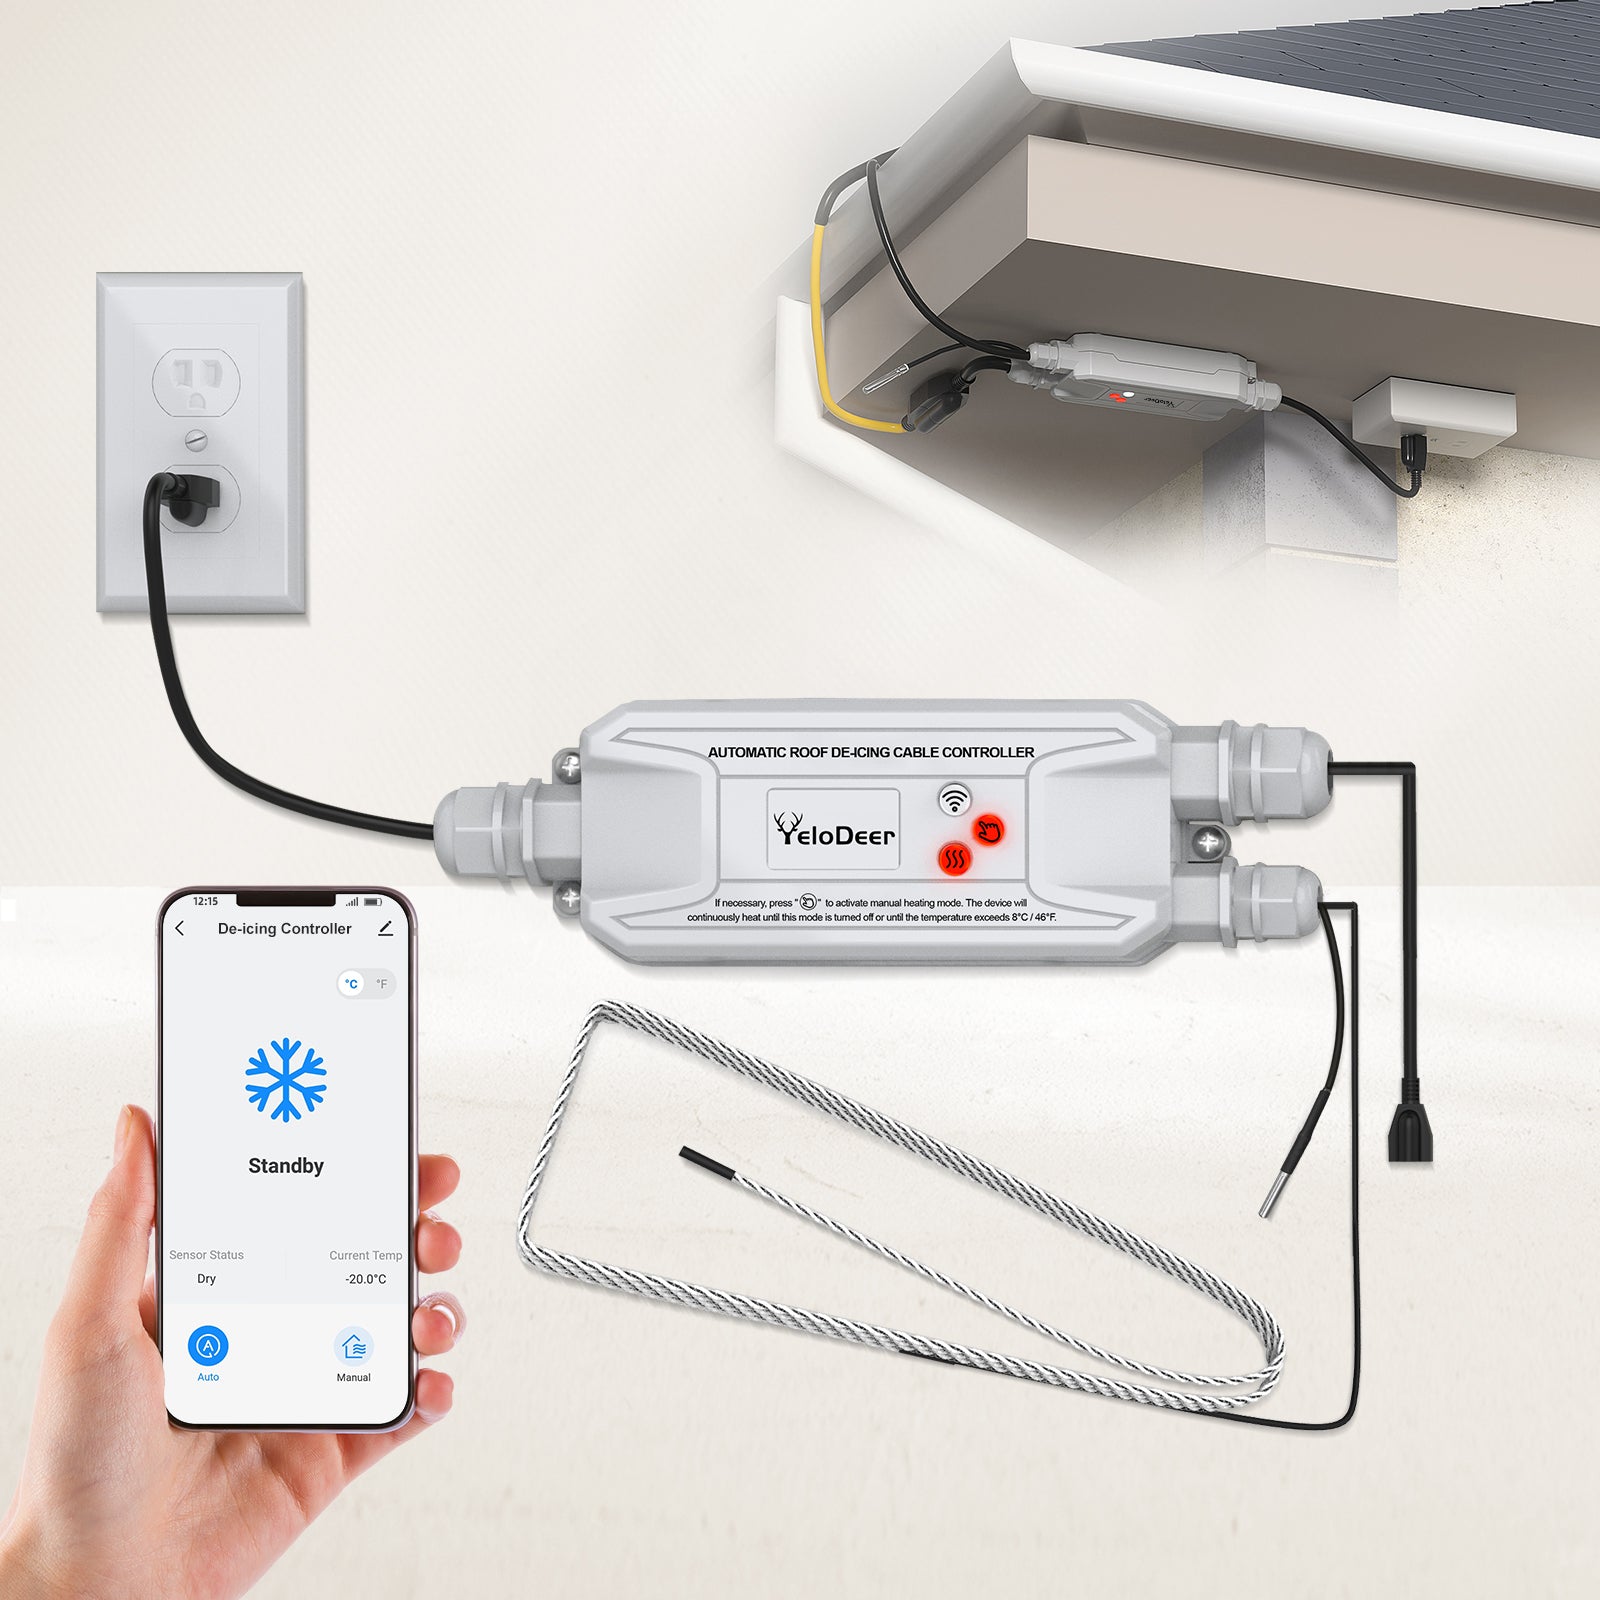
Leaving roof de-icing cable on continuously can waste electricity when there is no snow, ice, or melt-refreeze condition. A compatible roof heating controller can help manage runtime based on temperature and moisture.
YeloDeer Roof Heating Control
The YeloDeer Roof Heating Control helps manage roof de-icing cable operation based on temperature and moisture conditions, reducing unnecessary runtime compared with always-on operation.
Explore Roof Heating ControlA controller can help reduce unnecessary runtime, but sensor placement, system load, wiring, settings, and cable layout still need to be correct.
Installation and Safety Tips
Roof de-icing cable should be installed carefully to avoid damaging the roof or creating electrical risks.
Safety reminder: roof work can be dangerous. For steep roofs, multi-story homes, hardwired systems, or complex layouts, consider hiring a qualified installer or electrician.
Common Mistakes to Avoid
FAQ
How do ice dams form?
Ice dams form when snow melts on a warmer roof section, runs down to the colder eaves, and refreezes. Repeated melt-and-refreeze cycles build a ridge of ice that can block drainage.
Can ice dams cause roof leaks?
Yes. When water backs up behind an ice dam, it may seep under shingles and enter the roof structure, ceiling, walls, or insulation.
Do roof de-icing cables prevent ice dams completely?
No. Roof de-icing cables can help reduce ice dam risk by creating melt paths, but they cannot guarantee that ice dams will never form. Roof design, insulation, ventilation, weather, and gutter condition also matter.
Where should roof de-icing cable be installed?
Common locations include lower roof edges, gutters, downspouts, valleys, and shaded areas where ice tends to block drainage. Follow the product manual for cable spacing and routing.
Are roof de-icing cables safer than climbing on the roof to remove snow?
They can reduce the need for repeated manual ice removal in cable-covered areas. However, they still require proper installation, electrical protection, and seasonal inspection.
Can I use chemical de-icers instead?
Chemical de-icers may help in some situations, but they can affect plants, metal, pets, runoff areas, or roofing materials depending on the product. Always check the label and roof compatibility.
Should I use a controller with roof heating cable?
A compatible controller is recommended for many systems because it can help operate the cable when temperature and moisture conditions call for de-icing, reducing unnecessary runtime.
What else should I do besides installing roof de-icing cable?
Clean gutters, inspect downspouts, improve attic insulation and ventilation where needed, check roof condition, and inspect the cable system before winter.
The Bottom Line
Ice dams form when melting snow refreezes along cold roof edges and blocks drainage. If water backs up behind the ice, it may lead to leaks, roof damage, insulation problems, and moisture issues inside the home.
Roof de-icing cables can help reduce ice dam risk by creating melt paths along roof edges, gutters, and downspouts. They are most useful when installed before winter and paired with clean gutters, proper clips, electrical protection, and a suitable controller.
For recurring ice dams, also review attic insulation, ventilation, and roof condition so the system addresses both drainage symptoms and underlying heat-loss issues.
Prepare Your Roof Before Ice Dams Form
Need help choosing roof de-icing cable, cable length, clips, or a controller? Share your roof edge length, gutter length, downspout height, roof material, ice problem areas, and winter conditions. The YeloDeer team can help review a suitable setup.
Explore Roof De-Icing Products Shop Roof Heating Control Request Project Support