Smart Roof & Gutter De-Icing Controller — 120V Plug-In / 208–240V Hardwired
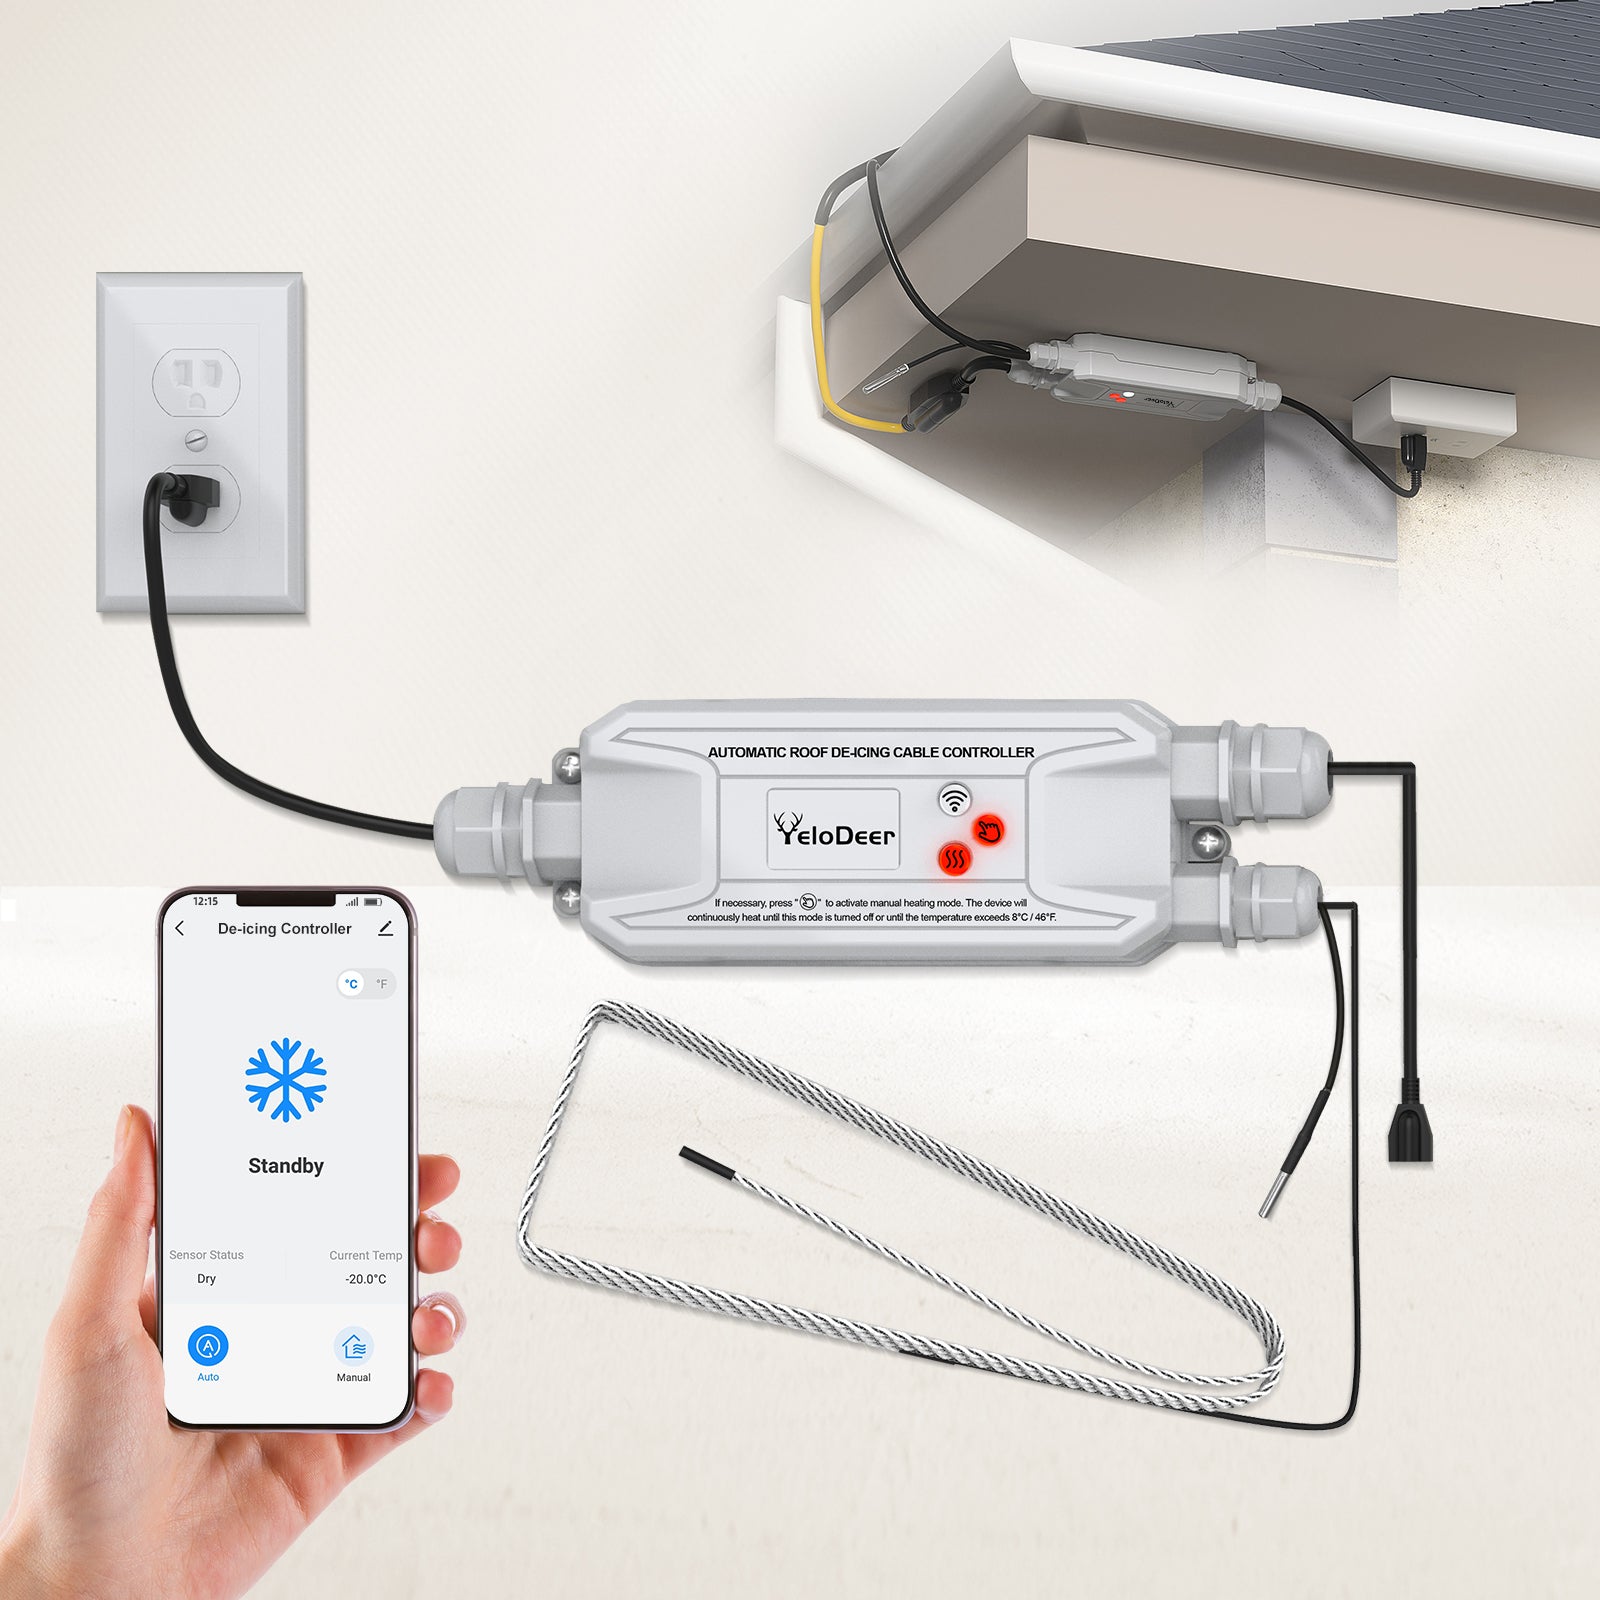
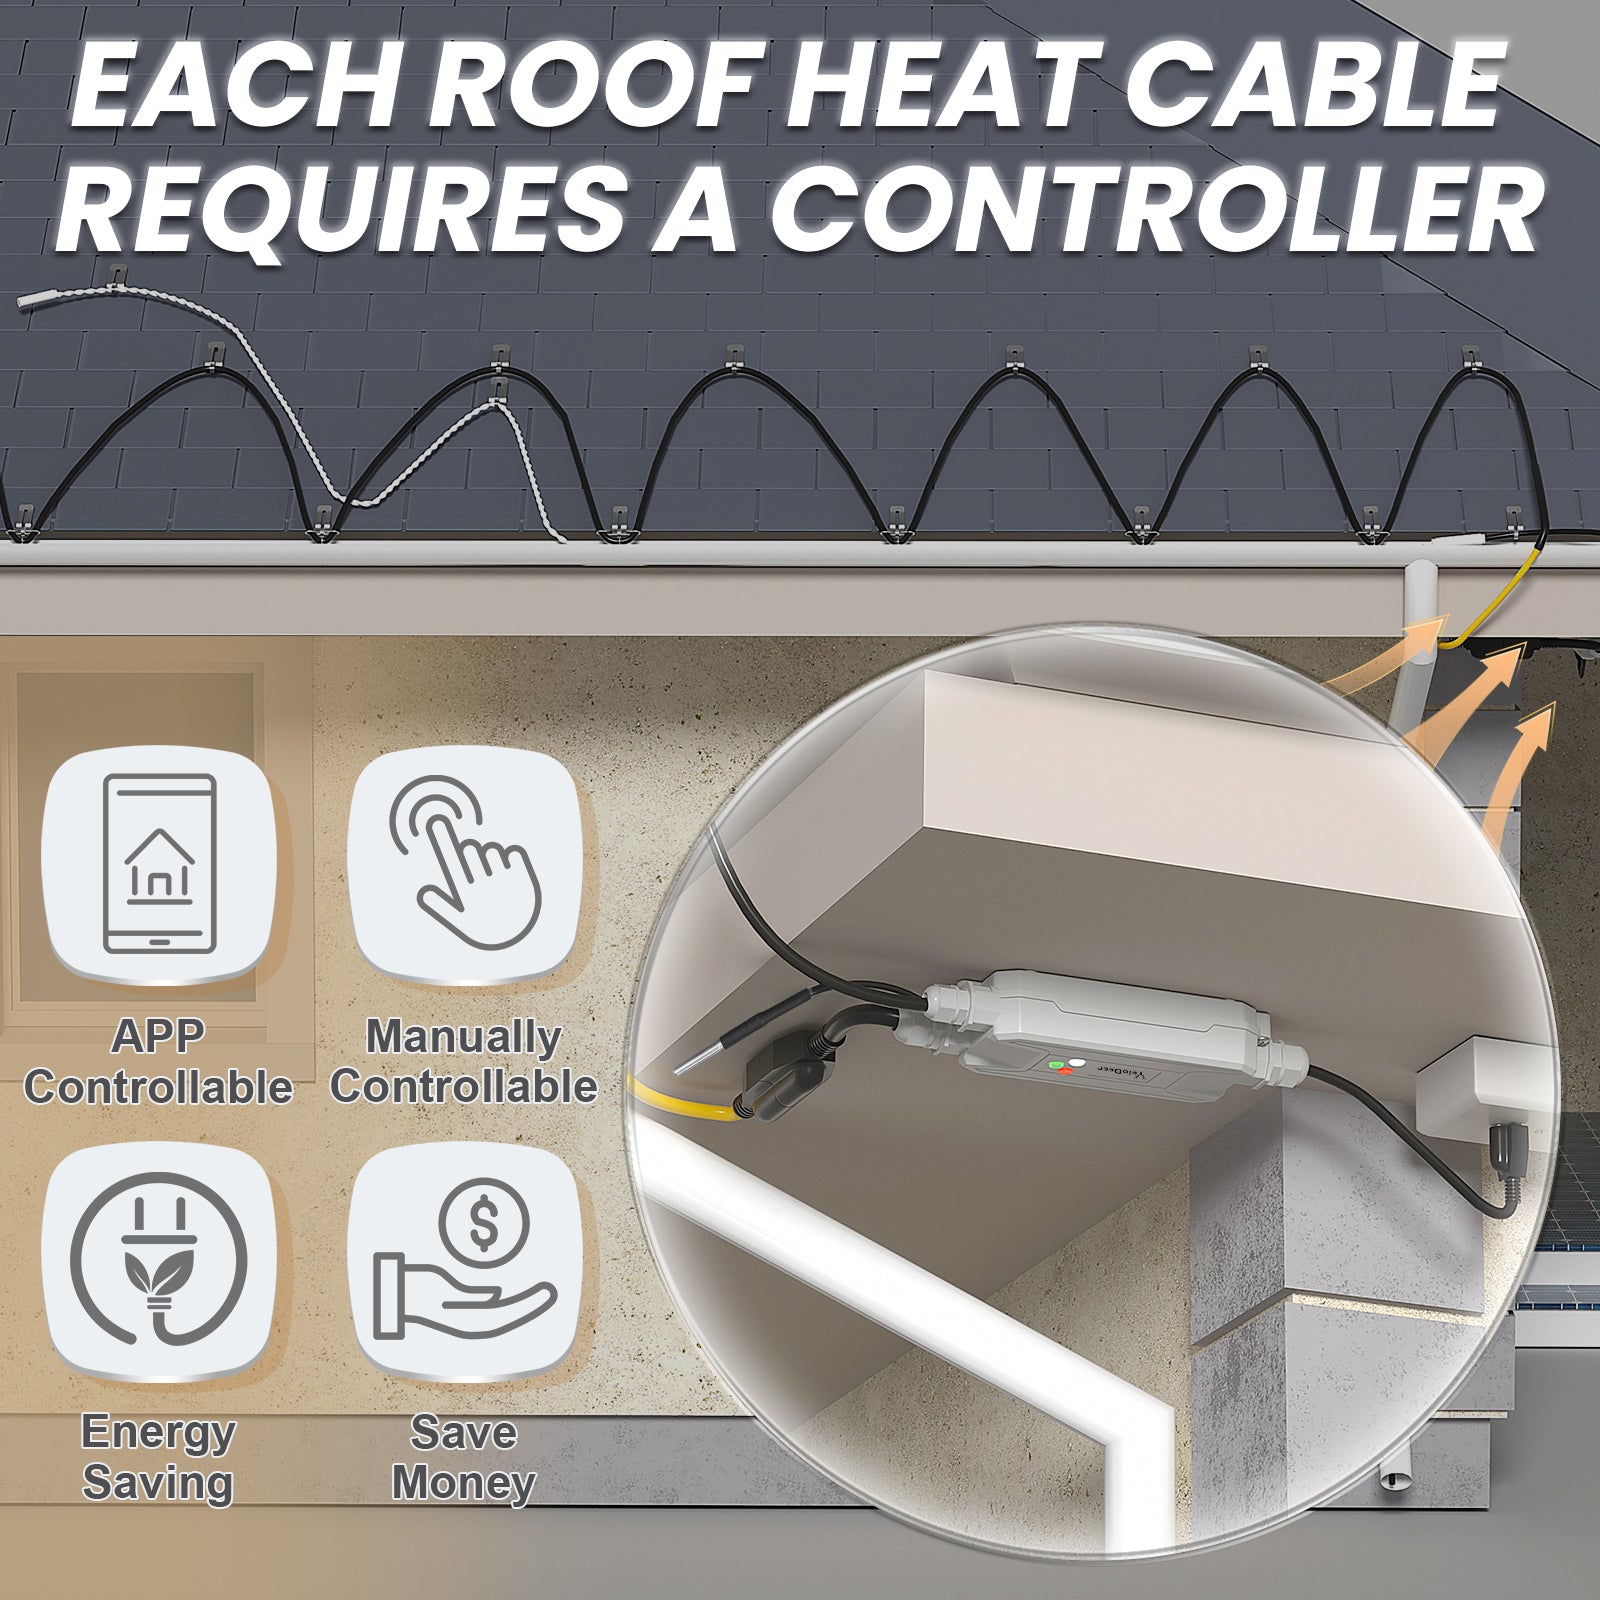
 The YeloDeer roof de-icing controller automatically manages compatible heating cable installed on roof edges, valleys, gutters, and downspouts. It is designed for roof and gutter de-icing systems only—not for pipe heat tape, floor heating, or general-purpose heating loads.
Auto Mode uses two different sensors: a built-in temperature sensor monitors outdoor air temperature, while the 10 ft external moisture sensor detects liquid water from melting snow or ice. Normal automatic heating begins when cold and wet conditions occur together.
Choose the Correct Version
120V Plug-In For compatible 110–120V roof and gutter heating cable. Includes a grounded power plug and plug-in heating output. Maximum load: 15A / 1800W at 120V.
208–240V Hardwired For compatible 208V or 240V roof de-icing systems. No direct plug or output receptacle is supplied; both power and heating-cable connections require manual field termination by a qualified electrician.
The 208–240V version is not plug-in. It uses hardwired L1, L2, and Equipment Ground connections. Confirm the supply voltage, heating-cable voltage, circuit protection, cable length, and wiring method before ordering.
Key Buying Information
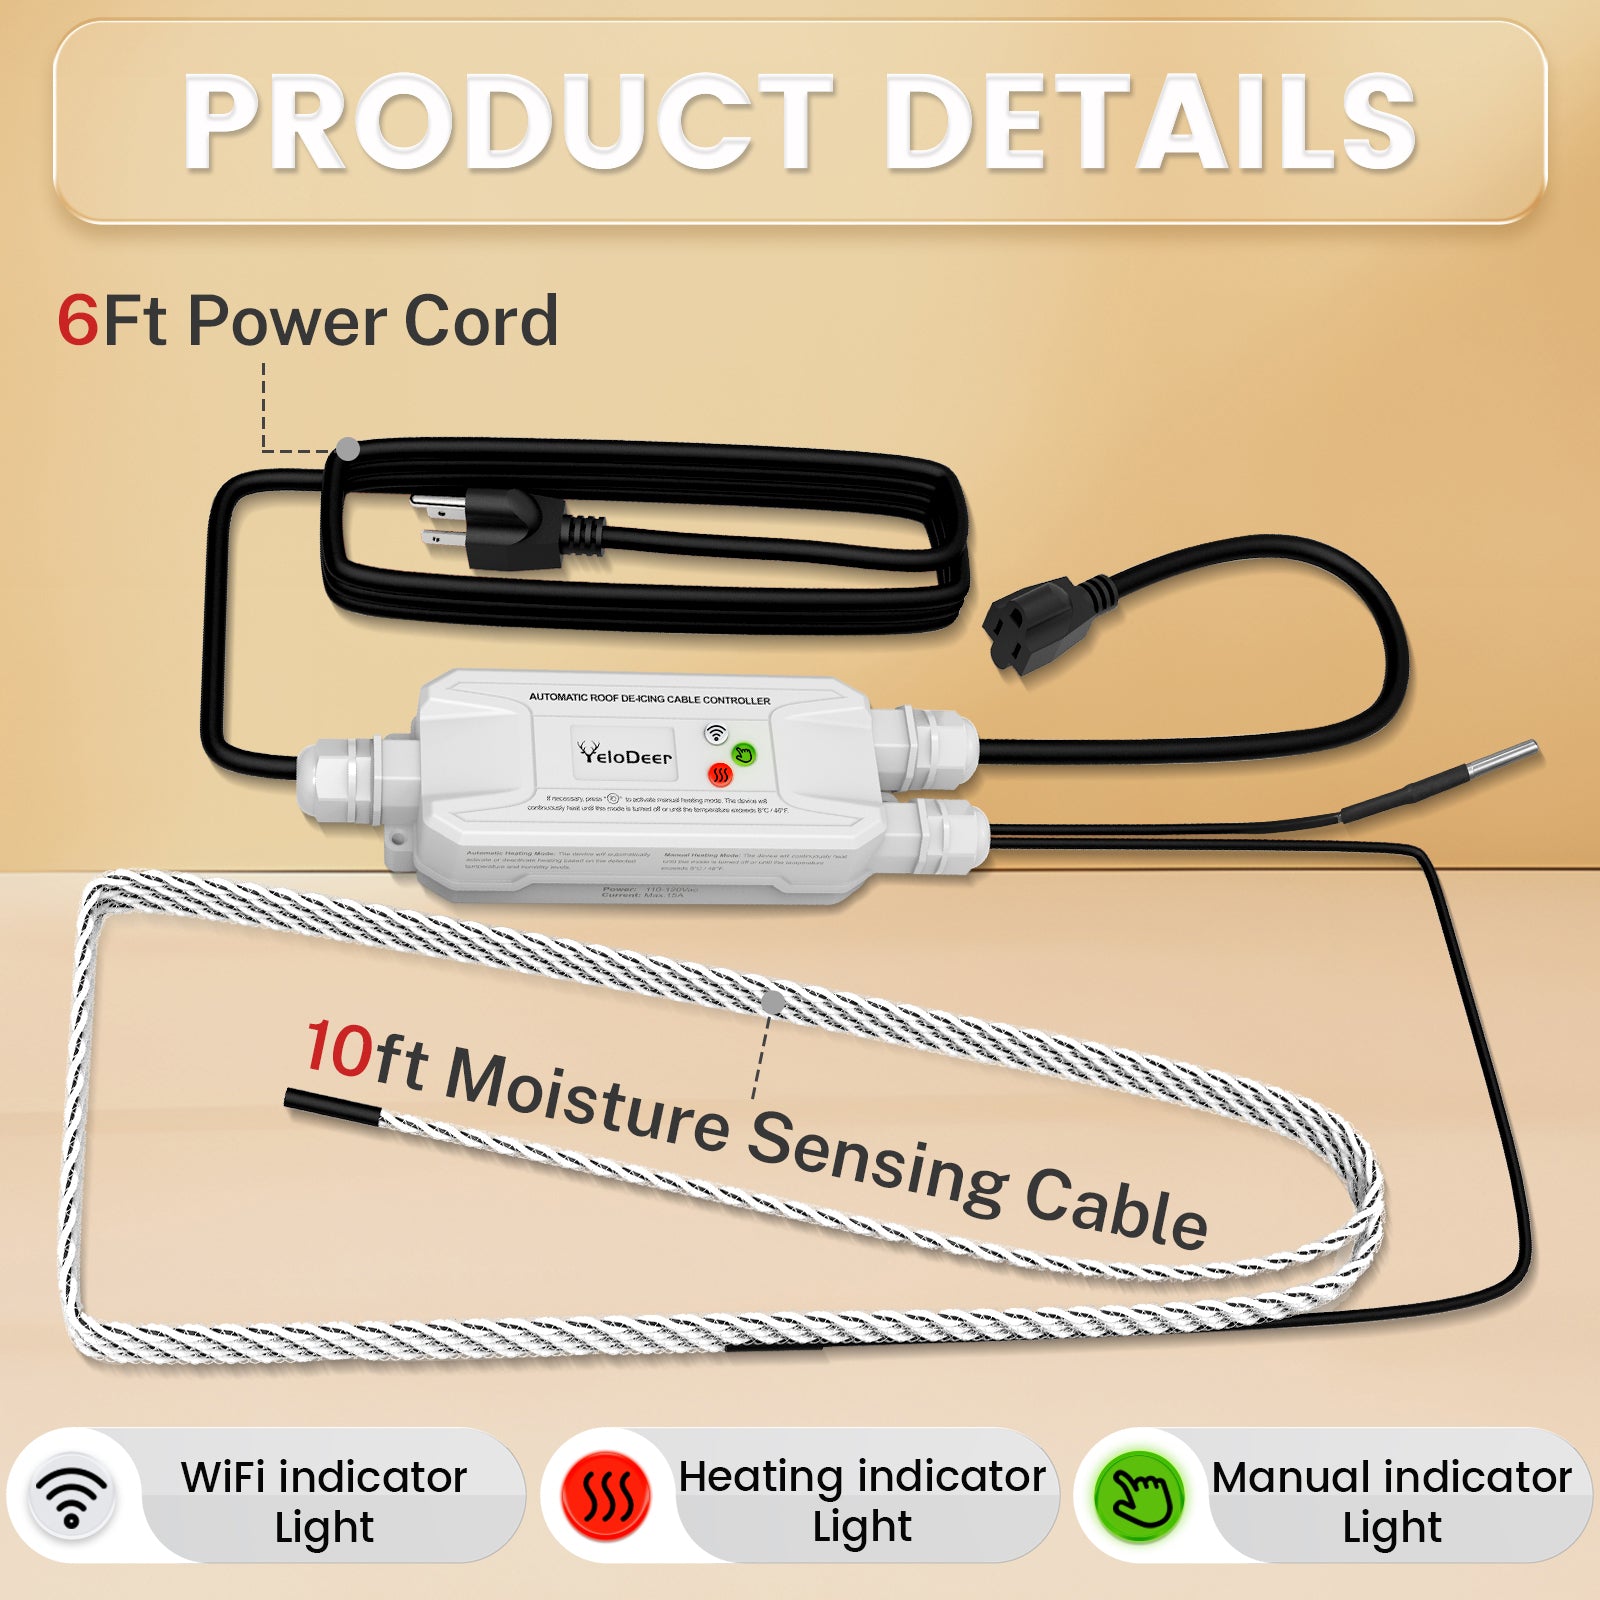
Temperature Sensor The built-in sensor monitors ambient temperature and enables cold-weather operating logic.
10 ft Moisture Sensor The separate sensor cable must contact meltwater before normal Auto Mode calls for heat.
15A Maximum Load Up to 1800W at 120V, 3120W at 208V, or 3600W at 240V, subject to heating-cable circuit-length limits.
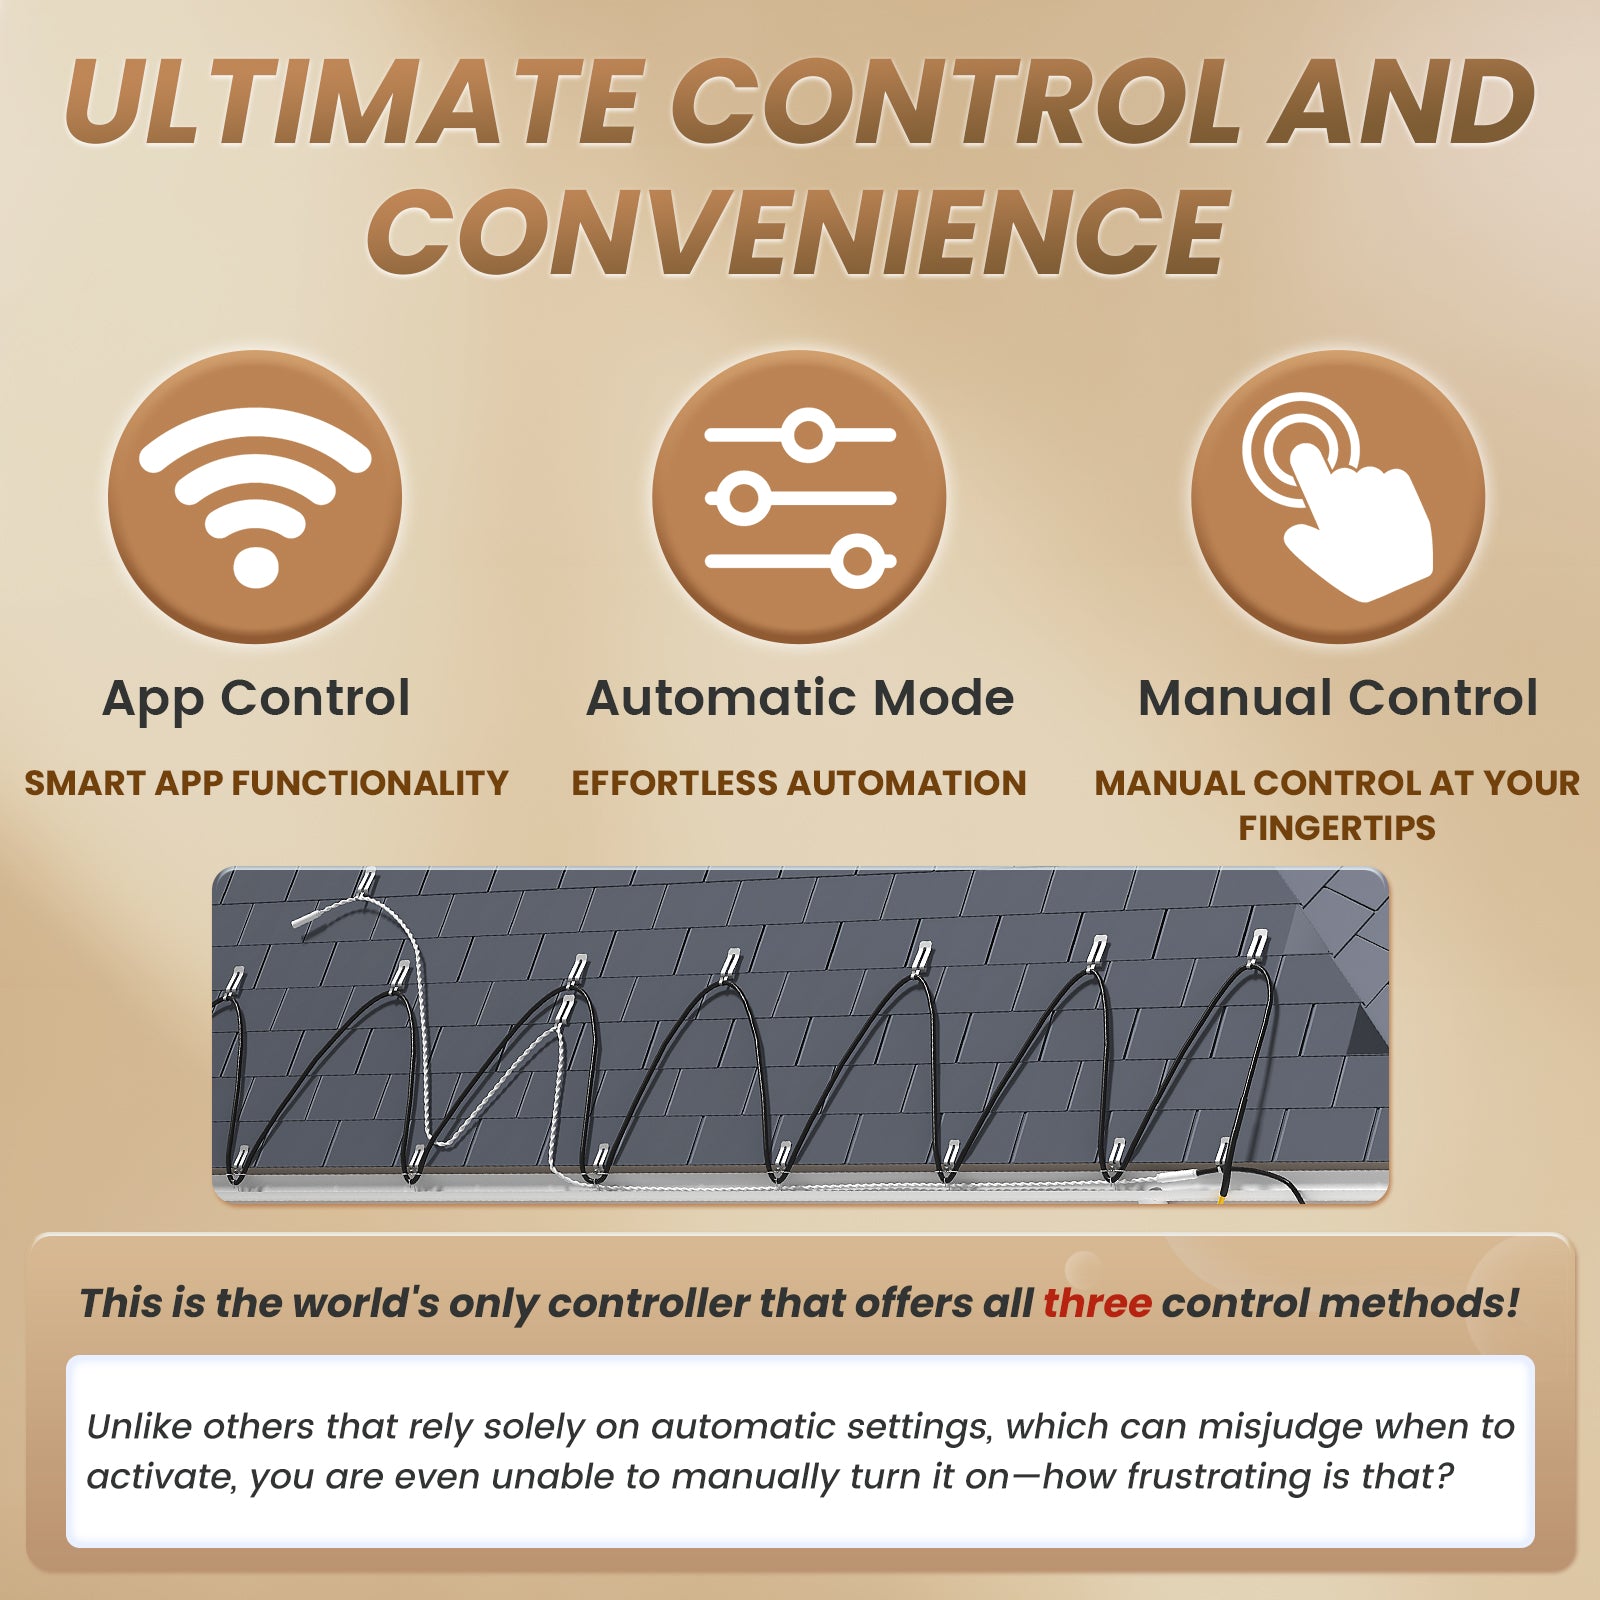
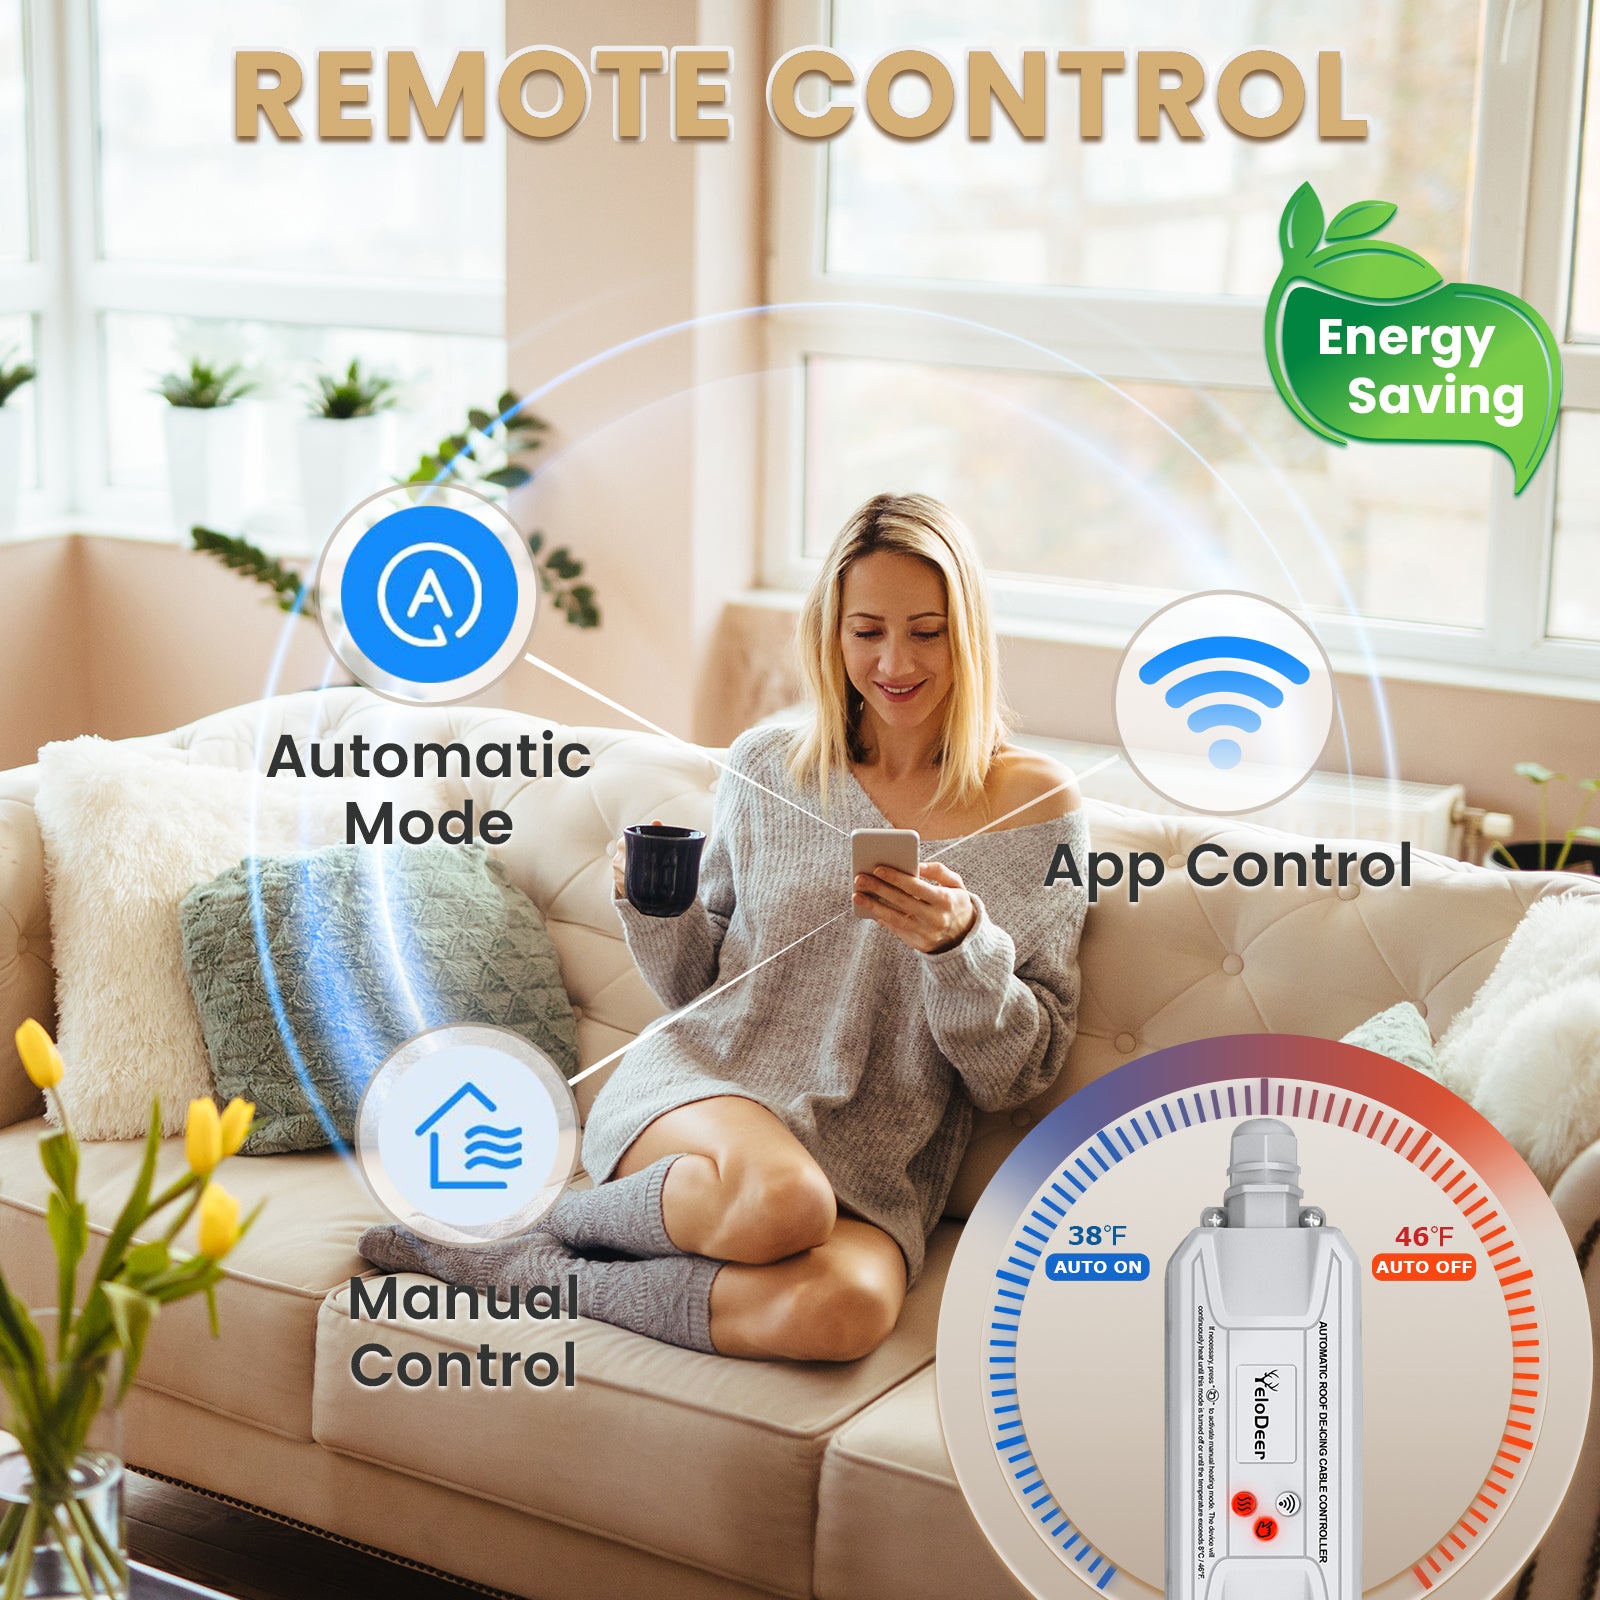
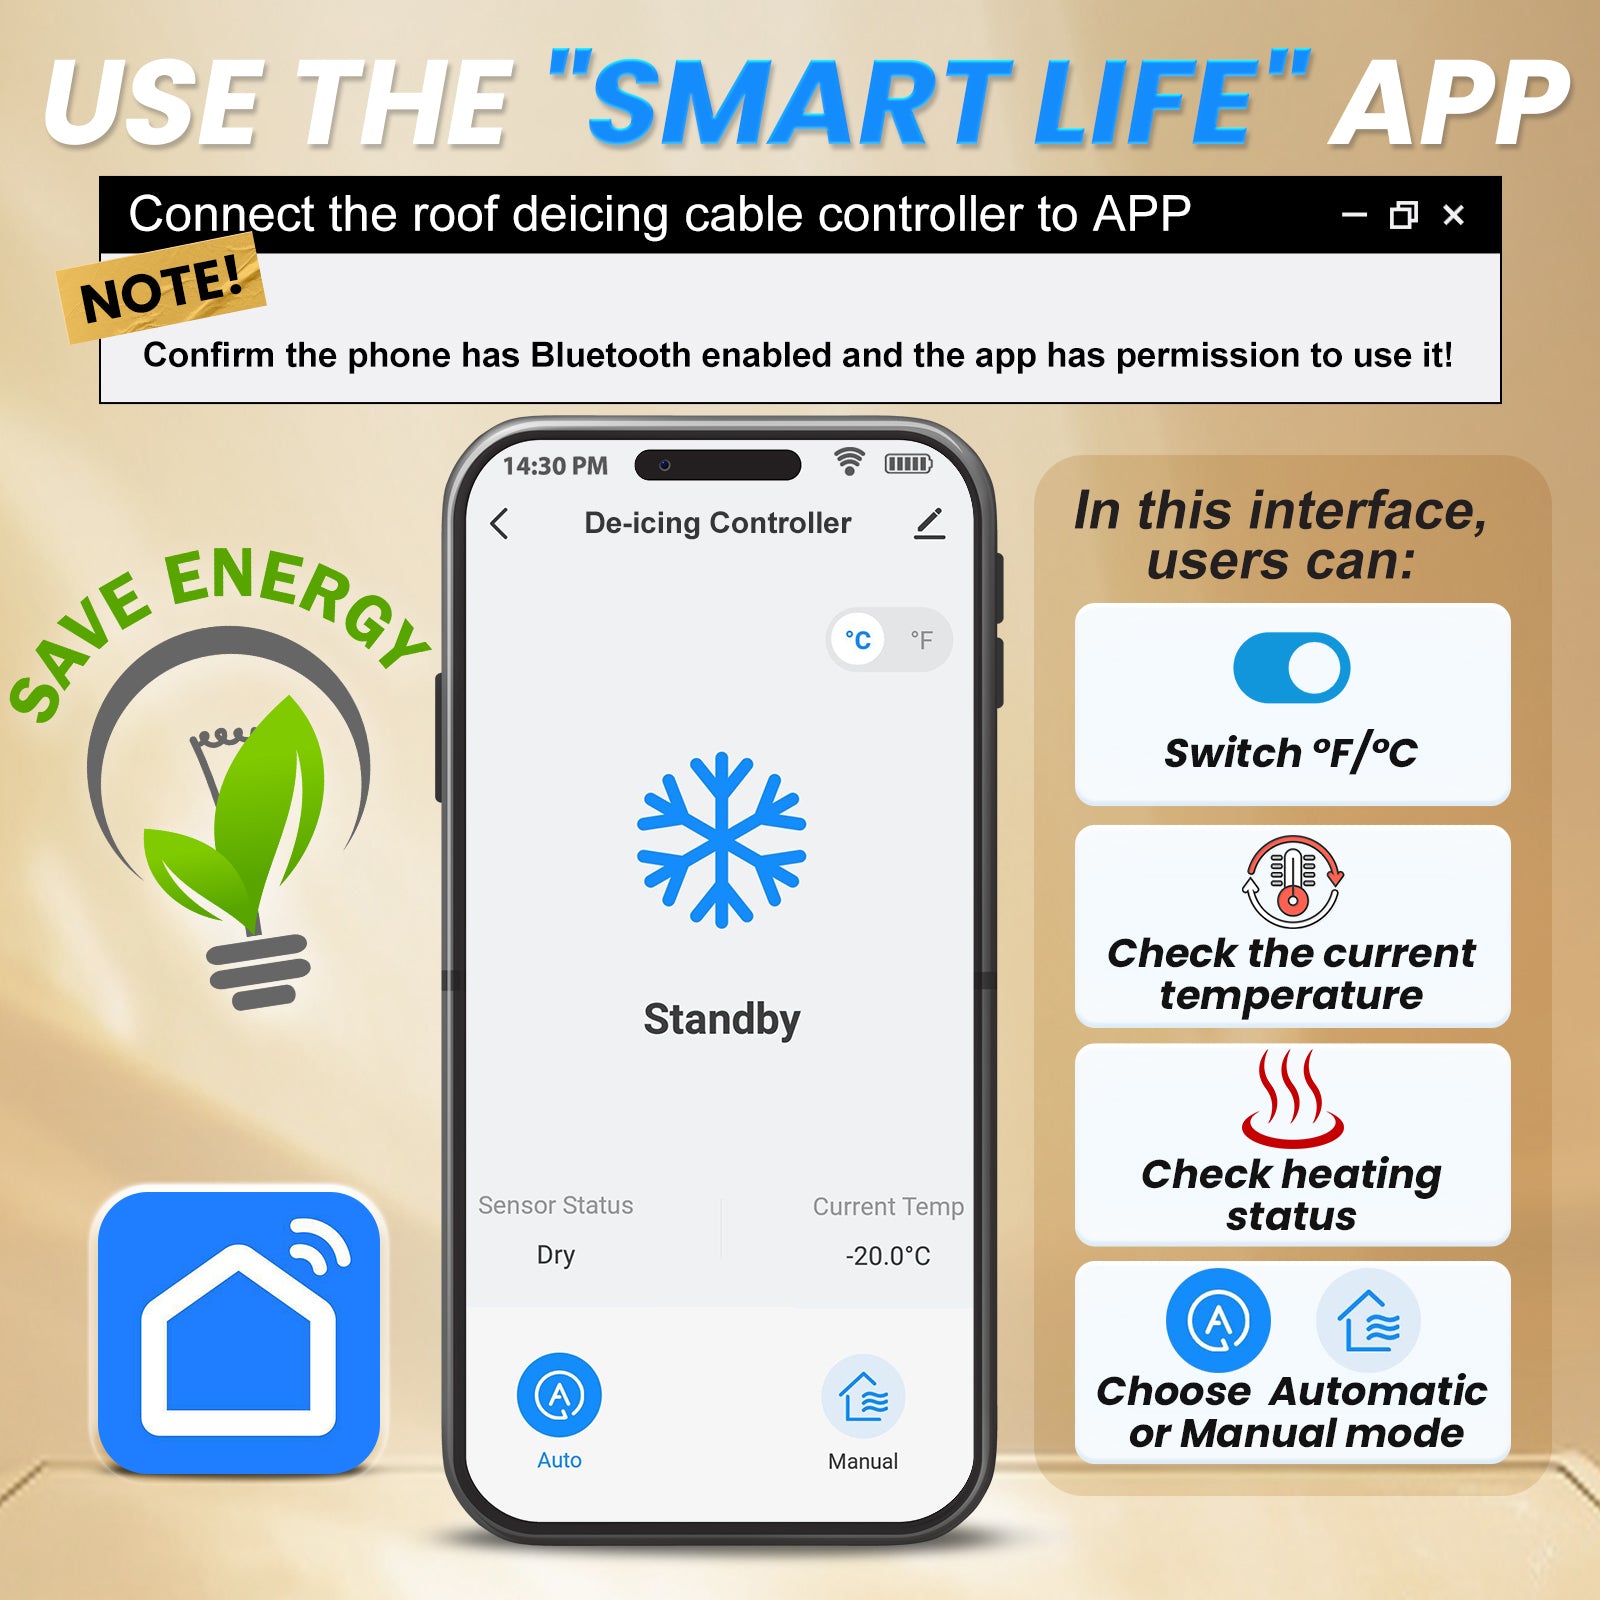
Auto, Manual & App Control Run automatically, apply a manual override, or monitor and change modes through the Smart Life app.

How Automatic Control Works

Cold Condition The built-in temperature sensor detects approximately 38°F / 3°C or below.
Wet Condition The external moisture sensor detects liquid water from melting snow or ice.
Heating Output When both conditions are met, the controller energizes the connected roof heating cable.
Upper Limit Heating stops when temperature rises above approximately 46°F / 8°C.
Visible snow alone does not guarantee automatic activation. If meltwater does not reach the moisture sensor, the app may continue to show Dry. Correct moisture-sensor placement is essential for reliable Auto Mode operation.
Before You Order
Use only with heating cable approved for roof, gutter, or downspout de-icing Keep the connected load within the controller's 15A maximum Check Maximum Circuit Length for self-regulating heating cable Provide required outdoor enclosures and electrical protection Use a 2.4 GHz WiFi network for Smart Life app connection Plan qualified field termination for the 208–240V version
For Roof & Gutter De-Icing Systems Only
Roof Edges & Valleys
Ice Dam Prevention Roof Edge Heating Valley Drainage Paths
Gutters
Gutter De-Icing Meltwater Drainage Refreezing Control
Downspouts
Frozen Downspouts Vertical Drainage Outlet Protection
Remote Properties
Vacation Homes Property Maintenance App Monitoring
Heating-Cable Compatibility
The controller can operate compatible YeloDeer or other-brand heating cable only when the cable is specifically approved for roof and gutter de-icing. Voltage, connection method, electrical load, cold-start current, and maximum circuit length must match the selected controller.
Roof/gutter application is approved by the cable manufacturer Controller, heating cable, and supply voltage match Total current and cold-start load remain within 15A Cable length follows the manufacturer's Maximum Circuit Length Installation layout maintains a continuous meltwater drainage path Outdoor connections receive required weather and ground-fault protection
Do Not Use It For
Pipe or In-Pipe Heating Do not use as a water-pipe heat tape thermostat or for in-pipe heating cable. Use the dedicated YeloDeer Pipe Heat Tape Thermostat instead.
Other Electrical Heating Do not use for radiant floor heating, baseboard heaters, HVAC equipment, snow-melting pavement systems, or general-purpose heating loads.
For pipe freeze protection, use the YeloDeer Pipe Heat Tape Thermostat Controller.
This controller helps maintain meltwater drainage paths and reduce ice-dam risk. It is not designed to rapidly remove heavy roof snow or a large ice dam that has already formed.
120V and 208–240V Comparison
| Specification |
120V Plug-In |
208–240V Hardwired |
| Product Type |
Smart roof & gutter de-icing controller |
Smart roof & gutter de-icing controller |
| Rated Voltage |
110–120V AC |
208–240V AC |
| Maximum Current |
15A |
15A |
| Maximum Power |
1800W at 120V |
3120W at 208V / 3600W at 240V |
| Power Input |
6 ft / 1.8 m cord with grounded plug |
6 ft / 1.8 m hardwired leads; no direct plug |
| Heating-Cable Output |
Plug-in receptacle |
Hardwired output leads; manual termination required |
| Hardwired Connections |
Not applicable |
Black: L1 / White: L2 / Green: Equipment Ground |
| Stripped Lead Length |
Not applicable |
Approx. 1/2 in / 13 mm |
| Temperature Sensing |
Built-in ambient temperature sensor |
Built-in ambient temperature sensor |
| Moisture Sensing |
10 ft / 3 m external moisture-sensor cable |
10 ft / 3 m external moisture-sensor cable |
| Normal Auto Activation |
Approx. 38°F / 3°C or below plus moisture detected |
Same |
| Upper Temperature Limit |
Approx. 46°F / 8°C |
Same |
| Control Modes |
Auto / Manual / Smart Life app |
Auto / Manual / Smart Life app |
| WiFi |
2.4 GHz |
2.4 GHz |
| Controller Housing |
IP65 |
IP65 |
| Power-Outage Memory |
Supported |
Supported |
| Included Accessories |
6 shingle clips, 2 spacers, 3 mounting screws |
6 shingle clips, 2 spacers, 3 mounting screws, 6 wire connectors |
| Installation |
Plug-in system |
Hardwired by a qualified electrician |
Control Modes
Auto Mode Uses both ambient temperature and moisture detection to operate during ice-forming conditions.
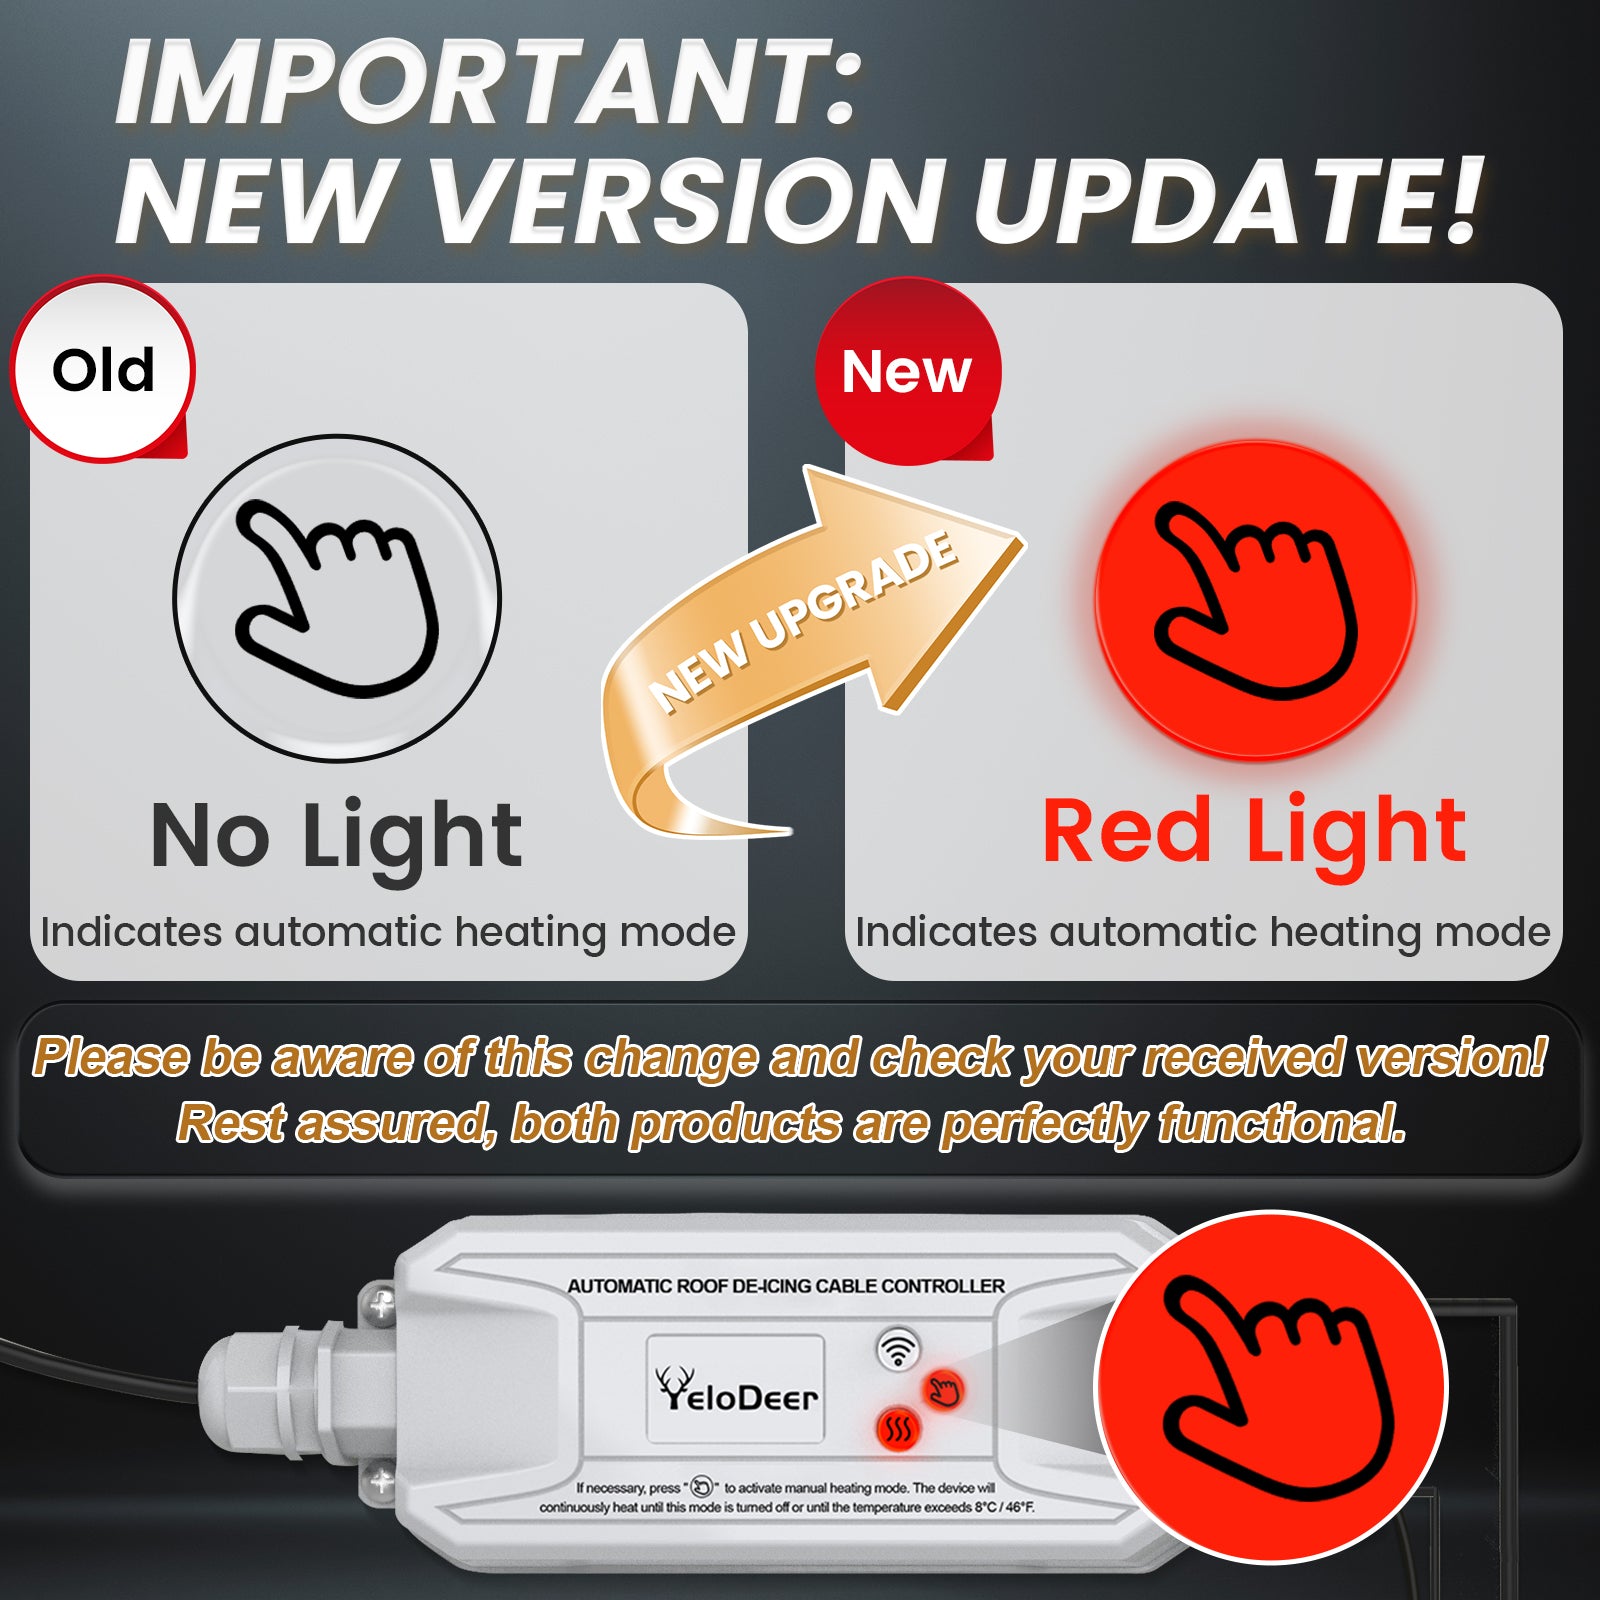
Manual Mode Energizes the connected roof heating cable for testing or temporary operation without waiting for moisture detection.
Smart Life App Shows temperature, Dry/Wet status, heating output, and operating mode when connected to 2.4 GHz WiFi.


Cold & Dry Periodic Heating
When temperature is below approximately 38°F / 3°C but the moisture sensor remains dry, the controller may run a short heating cycle of approximately 15 minutes every 3 hours. This is normal operation and may help create meltwater that can reach the sensor.
Self-Regulating Cable Sizing
Do not calculate maximum cable length only from nominal watts per foot. Self-regulating heating cable can draw higher current during a cold start. Follow the cable manufacturer's Maximum Circuit Length for its model, voltage, lowest expected start-up temperature, and a circuit size that remains within this controller's 15A rating.
Controller & Sensor Placement
Controller Mount upright in a suitable location where the built-in temperature sensor can represent outdoor conditions.
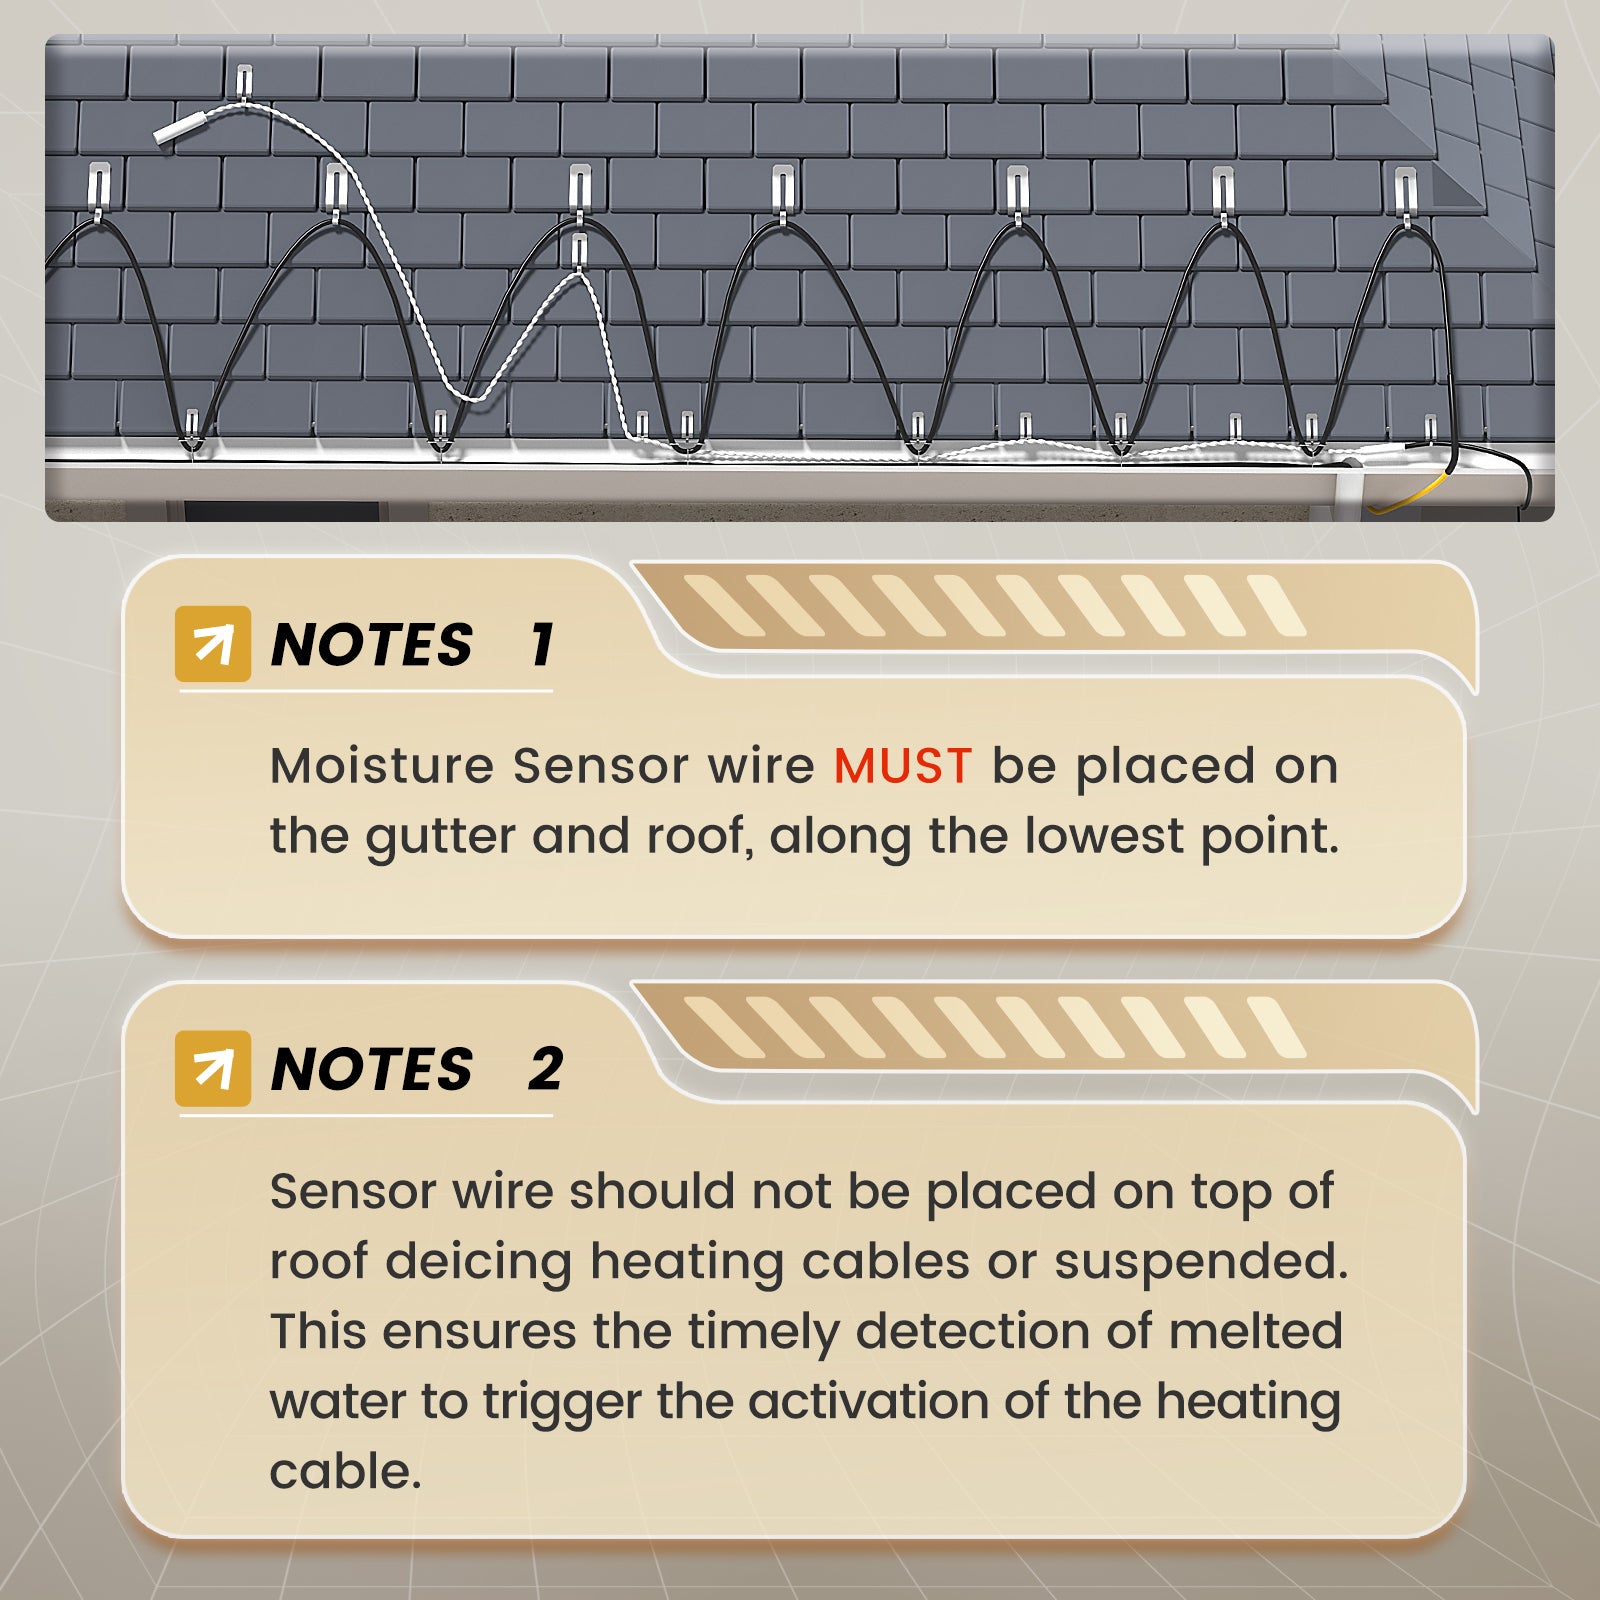
Moisture Sensor Secure the 10 ft sensor where meltwater naturally flows, such as a heated gutter or roof-edge drainage path.
Roof Cable Install only heating cable approved for the roof material, gutter, and downspout application.
Electrical Connections Keep plugs, wire connectors, junction boxes, and terminations protected from standing water and direct exposure.
Do not cut, shorten, splice, or extend the moisture-sensor cable. Placement must allow liquid meltwater to contact the sensor; dry snow alone may not trigger normal Auto Mode.
120V Plug-In Version
- Verify the heating cable and supply are compatible with 110–120V.
- Confirm the cable load and cold-start requirements remain within 15A / 1800W.
- Install the roof heating cable and moisture sensor according to their instructions.
- Connect the roof heating cable to the controller's output receptacle.
- Plug the controller into a properly grounded and protected 120V receptacle.
- Use Manual Mode to test heating output, then select Auto Mode for normal operation.
208–240V Hardwired Version
No plug is supplied. The incoming power and roof-heating-cable output both require manual field termination. Installation must be completed by a qualified electrician with power disconnected.
- Verify the controller, heating cable, and power supply are compatible with the actual 208V or 240V system voltage.
- Confirm the cable load and Maximum Circuit Length remain within the controller's 15A rating.
- Install the roof heating cable and moisture sensor according to their instructions.
- Terminate the heating cable to the controller's load/output leads.
- Terminate the controller's power/input leads to the supply.
- Complete Black L1, White L2, and Green Equipment Ground connections according to the supplied wiring diagram.
- Secure all terminations inside suitable approved junction boxes or enclosures before restoring power.
- Restore power, test with Manual Mode, and then select Auto Mode.
Electrical Protection
Provide required branch-circuit overcurrent protection Provide ground-fault protection required for the roof heating system Use suitable weatherproof receptacles, junction boxes, covers, and enclosures Follow the heating-cable instructions and applicable electrical requirements
WiFi Setup
- Install the Smart Life app and sign in or create an account.
- Connect the phone to a 2.4 GHz WiFi network.
- Power the controller and place it in pairing mode according to the user guide.
- Add the device in Smart Life and verify temperature, Dry/Wet status, and control mode.